Artwork guidelines

File organisation

  • Please add artwork dimensions (finished size) at the end of the file name.
  • Make sure that the artwork size and dimensions on the file name are matching.
  • If you are supplying multiple artwork files which use same assets throughout please collect all of the assets in one folder to avoid file duplication.

File formats

  • Accepted file formats are high res *.pdf without crop or bleed marks, or packaged and outlined Illustrator or InDesign files.
  • Where necessary, please supply layered Photoshop files too, even if artwork uses flattened images.

Image resolution and size

  • Image resolution at finished size (effective PPI) should be between 100 and 150 PPI for large scale graphics and 300 PPI for smaller ones.
  • Simply checking the file size or image DPI in Photoshop is incorrect. Quality of printed artwork is affected by image scale and its resolution.
  • If you are unsure about quality of your image, we are happy to check this for you.
  • Instead of masking off excess image, please crop it to finished size to decrease the file size.

Bleed

  • For any large format graphics please add 25mm bleed to allow for any site survey discrepancies during install. For any smaller graphics 3mm bleed is sufficient.
  • If no bleed is provided on cut to shape artwork we will offset cut path by -1mm or -2mm. This method is better than creating bleed by blurring and multiplying image.

Colour

  • Artwork and links should use CMYK mode using ISO Coated v2 (ECI) profile.
  • We can match colours to a Pantone reference as long as it is within our colour gamut (Pantone Solid Coated is recommended).
  • Where rich black is required please set it to CMYK 100/100/100/100.
  • The black and white images need to be supplied in greyscale mode.
  • Make sure your colours are consistent throughout all of your artworks in the same campaign. Also don’t use Pantone colour in one and CMYK or RGB in other file.

Fonts

  • Wherever possible please outline all text, otherwise supply all fonts used in your artwork.
  • If Postscript fonts have been used, supply both “printer” and “screen” fonts

File and artwork size

  • If possible please set up artwork at full size. If finished size is greater than software’s limitation, supply your artwork at 50%, 25% or 10% scale. In this case mark files accordingly in the file name (i.e. File-name@50%.ai) and add a note to the side of the artwork too so it doesn’t get missed.
  • If you file comes at file size over 1GB it will delay production. In this case we recommend checking your image sizes, make sure that resolution is set to a minimum and image layers are flattened.

File layers

  • Delete all unused colours and hidden layers.
  • Label the layers clearly. For example if you need to include guides for visualisation or positioning please rename this layer to “Do Not Print” or “DNP”, use “CUT” for cutting path, “PRINT” for print layer, etc.

Other

  • Cutter guide, matt & gloss printing, white ink printing and 3D raised printing are covered in detail on following pages.

Cutter guide

  • The cutter guide needs to be very accurate and to have as few points as possible. Use the “Pen Tool” (P) to draw your cut path to get the most precise result.
  • Do not use the Magic Wand or any other automated selection tool to create a path or “Average” or “Simplify” as it will be inaccurate.
    • he cutter guide stroke needs to be set to a contrasting spot colour set to overprint and possibly on a different layer, so it can be easily identified by our production team.
    • If no bleed is provided on cut to shape artwork we will offset cut path by -1mm or -2mm. This method is better than creating bleed by blurring and multiplying images.
    • We will be more than happy to create a cutting path for you for any text or images. Depending on complexity of shapes this could come at an additional artworking cost.

    Cutter guide

    Matt & gloss effect

      • This effect is achieved by printing shapes on to glossy material.
      • Whatever you want to be glossy should be set to white, and whatever needs to be matt need to be set as colour.
      • Please do not visualise gloss vinyl in your artwork with gradients or somehow else, as it will be get printed, making the whole printout matt.
      • If you leave any special colours in your artwork these will get printed too.

        matt & gloss effect

        White Ink

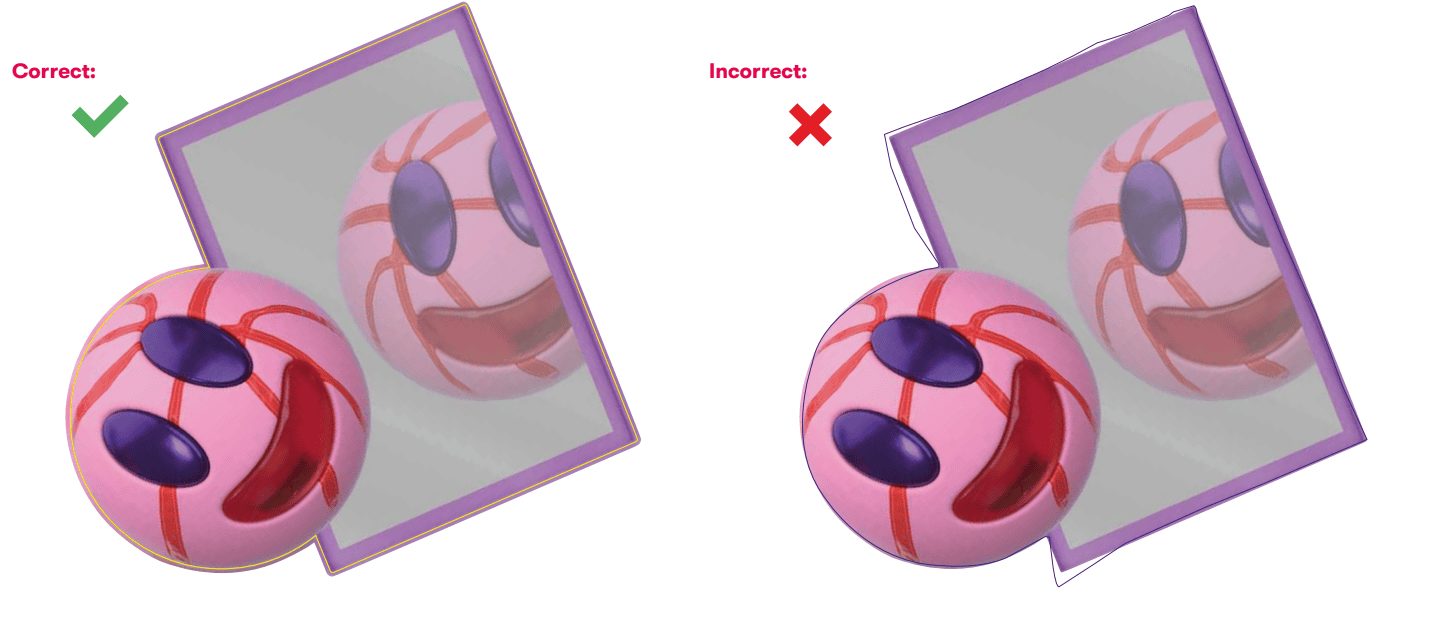
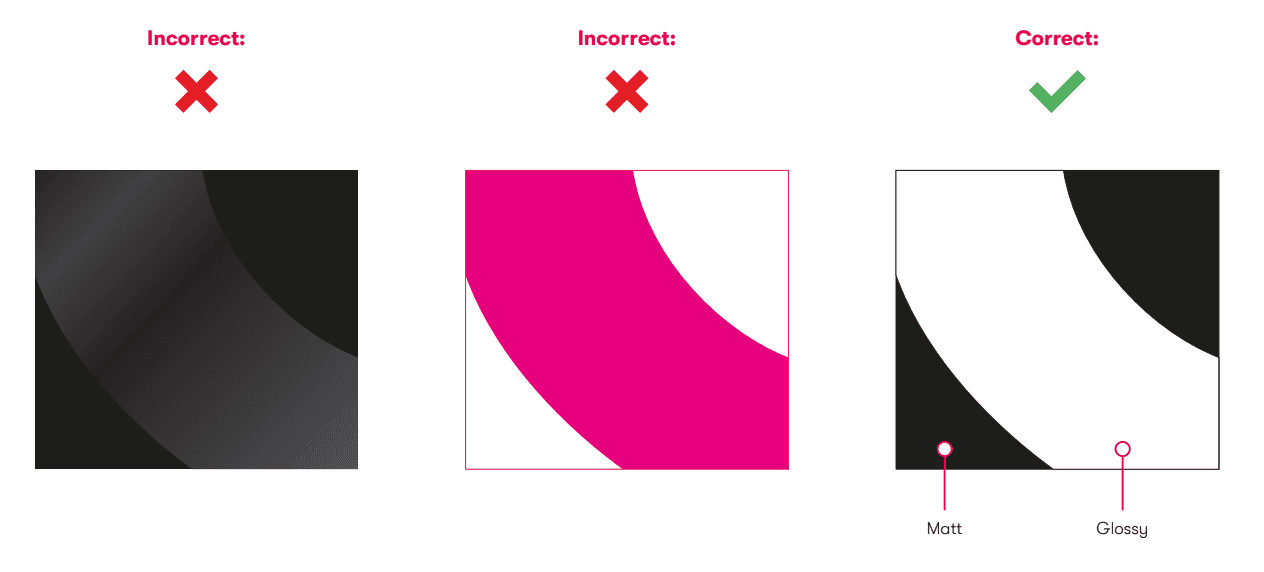
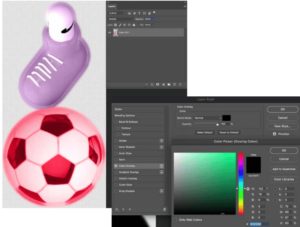
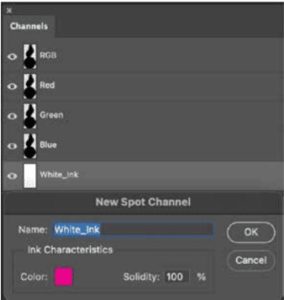
        Using white ink within your artwork is a great way for enhancing design and printing. White ink is used frequently, either within the four colour process or by itself on a single layer, within the artwork or behind depending on the desired effect.

        Setting up a white ink file in Illustrator:

        • Anything you want to print in white ink needs to be a spot colour titled ‘White_Ink’ otherwise it won’t get recognised by our software.
        • When saving out print ready files save white ink file as “Filename_WHITE.pdf” and colour file as “Filename_COLOUR.pdf”.
        • Dimensions of white and print files have to match exactly, otherwise the white ink and print layers will not align correctly in print.

        IMPORTANT!
        Dimensions of white and print files have to match exactly, otherwise the white ink and print layers will not align correctly in print.

          Setting up a white ink file in Photoshop:

          • Make sure your artwork is in RGB mode, background is separate from the image and everything is flattened to one layer.
          • In layer style apply colour overlay at RGB 0/0/0

          White ink

          White Ink

          • Rasterise the layer.
          • In channels tab create New Spot Channel titled ‘White_Ink’.

          Photoshop channel settings

          • Choose 100% magenta colour and 100% Solidity (unless you want less dense white ink coverage.)

          Photoshop colour settings

          • Hold down shift and select all channels other than ‘White_Ink’, select all and copy. Select ‘White_Ink’ channel and paste special (Edit> Paste Special > Paste in Place).

          Photoshop paste content

          • Delete all other channels. As a result you will see a black and white image.

          Photoshop settings 2

          • Save the file as a Photoshop DCS 2.0 format (including spot colours) and name it “Filename_WHITE” (this creates an *.eps file).

          Photoshop EPS

          Dye sublimation fabric

          Artwork size

          • The artwork needs to include a “Frame size” plus “Bleed for silicone edge” with an additional 15mm bleed. Everything is explained in the detail below.
          Frame size
          • The frame size is equal to the dimensions of the finished product once the fabric graphic has been installed in the frame.
          Bleed for silicone edge
          • For dimensions 1000mm or less add 10mm bleed.
          • For dimensions between 1000mm and 3000mm add 7.5mm bleed.
          • For dimensions greater than 3500mm no bleed is required.

          Visual area

          • Please note the visual area of your artwork is not the “Frame size”. To calculate “Visual Area” add the “Frame size” to the “Bleed for silicone edge” minus 24mm.

          Production timescale

          Please allow 3-4 days for general production and scheduling and 24hr resting period for all dye sublimation fabric prints prior to beginning the finishing process.

          Lead-times

          The Company observes a strict 72-hour lead time from the customer’s acceptance of proof files to goods delivery.
          Order placement or purchase order issue does not initiate lead times – this is initiated by receipt of print ready artwork.
          Additional fees may apply for expedited delivery.

          “There is no better feeling for a designer than creating something that is original, on brief and loved by the client.”

          We use cookies to ensure that we give you the best experience on our website.